Introduction
The Settlement module in Quidak streamlines the process of reconciling and closing financial transactions. It allows users to track and manage payments, credits, and adjustments efficiently. With features for automating invoice matching, recording payments, and generating reports, this module ensures accurate financial records and enhances cash flow management. By simplifying the settlement process, it supports timely decision-making and improves overall financial visibility.
- Add
The Add button helps you create a new settlement invoice. Click the button if you want to create a new settlement invoice.
- Print Icon
Allows you to print invoices
The Settlement module in Quidak streamlines the process of reconciling and closing financial transactions. It allows users to track and manage payments, credits, and adjustments efficiently. With features for automating invoice matching, recording payments, and generating reports, this module ensures accurate financial records and enhances cash flow management. By simplifying the settlement process, it supports timely decision-making and improves overall financial visibility.
How to Make Settlement
-
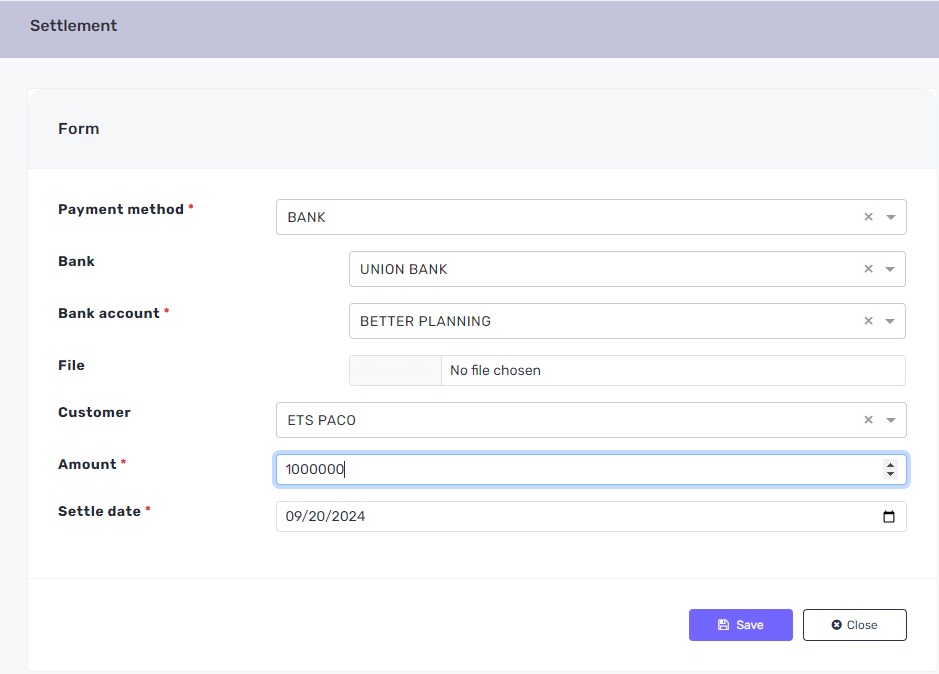
Select Payment Method: In the Payment Method field, choose the appropriate method for the settlement (Bank and Cash). This is a required field.
-
Choose Customer: In the Customer field, select the customer associated with the settlement. This will link the payment to the correct account.
-
Enter Amount: In the Amount field, input the total amount being settled. Ensure that this amount accurately reflects the payment to be processed.
-
Settle Date: In the Settle Date field, enter the date on which the settlement will occur. This helps in tracking and reconciling transactions.
-
Save the Settlement: Once all fields are completed, click the Save button to finalize the settlement.
-
Save Button: After entering the information, click the Save button to store the settlement information in the system.
-
Close Button: To exit the form without saving any changes, click the Close button. If you’ve saved your changes, the form will close, and the new supplier will be added to your records.
By following these steps, you can easily create and manage settlements within the system.
How to Validate a Settlement
To validate a settlement, open the settlement menu.
All invalidated settlement are saved as Draft settlements and will display with;
- Green Mark Icon
Allows you to validate created settlement(s)
- Blue Pen Icon
Allows you to edit a created settlement(s)
- Red Icon
Allows you to delete a created settlement(s)
- Print Icon
Allows you to print invoices


